教程:新功能在Adobe Premiere Pro CC
今天,Adobe宣布了将在NAB上首次亮相的所有Creative Cloud视频应用程序的更新. 以下是最新消息的详细内容, 加上四个关键的新功能的视频教程在Premiere Pro CC:主剪辑, 生活的文本, 掩蔽和跟踪, 以及新的4K格式支持.
在本教程中,我将向您展示Adobe Premiere Pro CC中的四个关键新功能. 首先是掌握剪辑.
掌握剪辑
你可以看到 图1(下面)在Twirls序列中,我已经使用了Twirls剪辑4次. 回顾时间线上的录像, 看起来它可以使用更多的亮度和对比度. 使用以前版本的Premiere Pro, I’d have to add the Brightness and Contrast adjustments to each instance of the clip in the timeline individually.

图1. Twirls剪辑在这个时间轴上出现了4次. 单击图像以查看其全尺寸.
新的掌握剪辑功能可以让我更快地进行调整.
First, I select the Twirls clip in the Project panel and press F to open it in the Source Monitor. Then I click the Effects tab and choose Video Effects > Color Correction > Brightness & 对比并拖动到项目面板中,并将其放在Twirls剪辑上. 现在,如果我转到效果控制面板,我可以看到亮度 & Contrast effect has been added to Twirls in the Project panel (not just the selected clip in the timeline).
现在, if I make a Brightness adjustment to the Twirls clip in the Project panel (an excessive one to underscore the point, 如图所示 图2),调整将反映在时间轴上剪辑的所有实例中.

图2. The Brightness adjustment I made to the Twirls clip in the Project panel has been applied to all instances of the clip in the sequence. 单击图像以查看其全尺寸.
This new feature is very convenient if you’re using one clip in multiple places and need to apply an adjustment to all the places it appears in your project.
掩蔽和跟踪
接下来是掩蔽和跟踪. 基本上,Premiere Pro中的每个效果现在都带有遮罩. So let’s say I want to do a Witness Protection Program effect on the dancer in my clip and blur her face. 为此,我将使用马赛克效果. I choose Effects > Video Effects > Stylize > Mosaic, 然后将其拖到时间轴上的剪辑上, 就像我在以前版本的Premiere Pro中那样.
当我打开效果控制面板自定义效果, 直接在马赛克下,我看到椭圆和方形按钮(下面的图3),允许我创建一个椭圆或正方形蒙版,并应用这样的效果.

图3. 将椭圆按钮夹在效果下面创建一个椭圆蒙版.
When I click the ellipse button, Premiere Pro creates a mask in the clip in the sequence 如图所示 图4(下面).
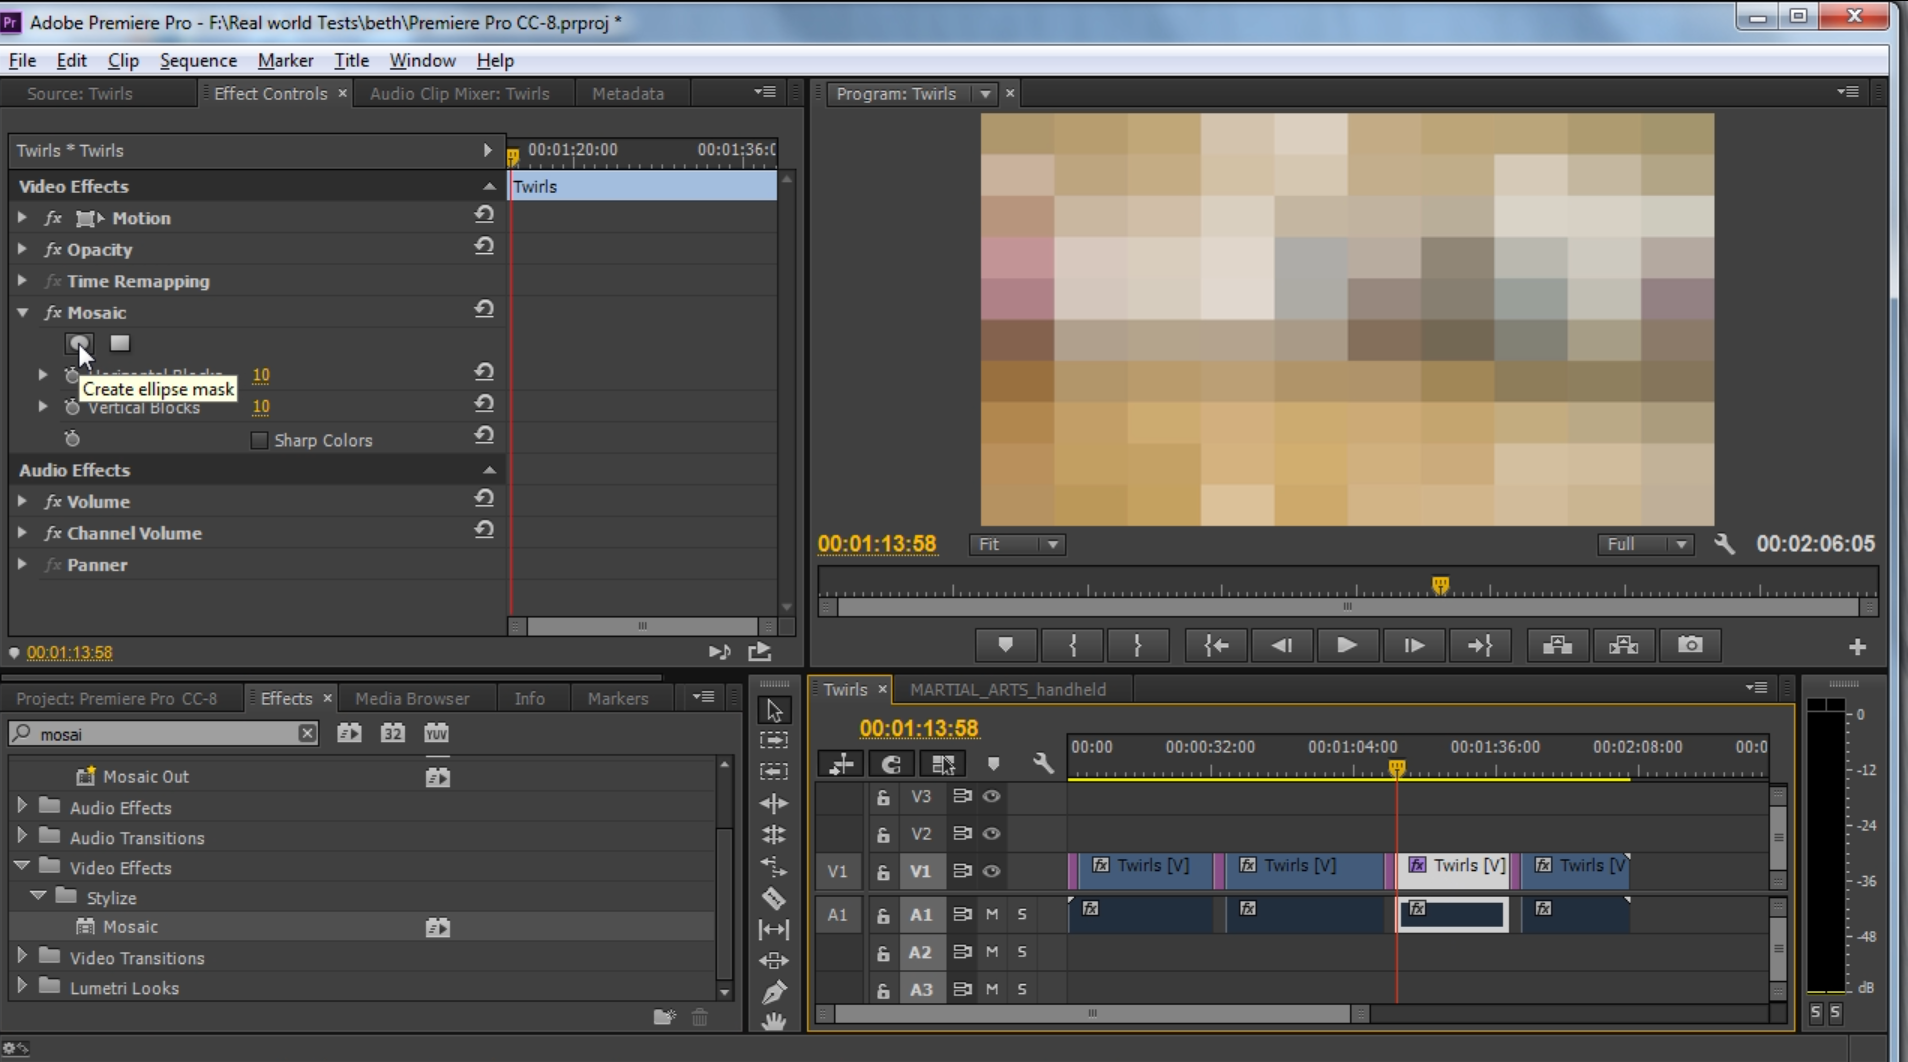
图4. 应用于剪辑的椭圆蒙版. 单击图像以查看其全尺寸.
下一个, I zoom in on the image and size the mask for the face using the bounding controls on the ellipse (下面的图5).

图5. 椭圆蒙版调整大小,只覆盖脸部.
到目前为止,我们所做的只是隔离了她脸上的面具. 这在这个特定的画面里效果很好,但是当她移动的时候? 这是效果的跟踪部分.
来跟踪蒙版, 回到效果控制面板, and under Mosaic > Mask, 点击蒙版路径右侧的播放按钮, 又名“轨道选定掩码向前”(下面的图6).

图6. 点击这里跟踪遮罩.
将打开跟踪进度窗口, 以前在After Effects中执行的过程现在在Premiere Pro中执行. 随着跟踪过程的进行,你可以看到面具跟踪对象的运动. 正如您可以在本文开头的视频中看到的2点58分左右, 当舞者开始在地板上移动时, 面具或多或少跟随着她的脸. 如果你看到它偏离轨道, 您可以停止该进程, 通过手动将面具移回她的脸部位置来纠正它, 然后再次单击播放按钮以在您停止它的位置恢复跟踪.
一旦过程完成, 当舞者在地板上移动时,你可以看到面具跟随她的脸. 所以,你不仅得到了屏蔽效果,还得到了跟踪效果. 在以前的版本中,你必须使用After Effects来跟踪蒙版.
相关文章
This tutorial demonstrates how to use an After Effects alpha matte to make your video "shine through" your text.
新的After Effects功能包括额外的键控效果, Kuler集成, and the ability to create live text templates and to share masks with Premiere Pro; Photoshop gets more powerful Smart Objects, 改进的图层对比和内容感知技术, 模糊画廊运动效果, 和焦点蒙版
新闻 includes major updates to Adobe Premiere Pro CC and Adobe After Effects CC and new features for Adobe Anywhere, the collaborative workflow platform that empowers teams using Adobe professional video apps to work together as they access and manage centralized media and assets across virtually any 网work
在本教程中, 我们将看看如何与TechSmith Camtasia创建屏幕截图, and then import them into Adobe Premiere Pro to incorporate them into your existing Premiere Pro projects to create professional-quality instructional videos that seamlessly combine screencams and HD footage.
Here are three quick tips that will streamline your titling workflow in Premiere Pro when you create styles you like and want to use them consistently without reinventing them each time.
SpeedGrade的新speedlook, 面具跟踪在After Effects, 同步设置在Adobe媒体编码器, 改进的多镜头在Premiere Pro, 扩展的超高清/4k支持, 和更多的
Using Adobe Lightroom 5 to color-grade and apply metadata to DSLR video files is simple and efficient and can benefit live-switchers doing minimal edits, 编辑新手, 专业编辑探索非传统的工作流程.
而After Effects可能会让一些Premiere Pro编辑望而生畏, here is an easy-to-follow workflow that can enliven your text and titles with pre-built animations found in Adobe Bridge, 在After Effects中应用了几个简单的步骤, 并直接导入到您的Premiere Pro时间轴.
Recent upgrades to Adobe CC make it easy to apply graded looks in Adobe Premiere Pro CC and match shots with different color temperatures via seamless roundtripping between Premiere Pro CC and SpeedGrade CC.
在最后一轮音频编辑冠军iZotope RX 3和Adobe Audition CC之间, 我们比较了两种音频编辑器的降噪和混响/回声减少.
在由两部分组成的系列文章的第一部分中, 1月时 compares the declipping and crackle and pop-removal features in iZotope's new RX 3 pro audio editor to the parallel features in Adobe Audition CC.
探索3个新的关键功能在试听CC, the newest version of Adobe's professional audio editing application: Sound Removal for eliminating hums and other variable-frequency unwanted noises, 响度雷达仪表,用于匹配和坚持广播音量标准, 和自动语音对齐ADR.
如果你发现自己不得不从Premiere Pro渲染多个序列, 有一种比使用Premiere Pro Export控件更简单的方法. 本教程将解释更容易和更有效的方式使用Adobe媒体编码器.
Here's a quick tutorial for Premiere Pro CC users on how to migrate encoding presets that you created to customize and streamline encodes in Adobe Media Encoder CS5/6 into Adobe Media Encoder CC so you can pick up right where you left off.
在本教程中 you'll learn how to create and edit industry-standard closed captions for video using the new closed-captioning capabilities in the just-released Adobe Premiere Pro CC.
Two types of noises degrade the audio you shoot with your video: random noises like microphone clicks and pops, 以及持续的噪音,比如白噪音或空调嗡嗡声. 本教程演示如何在Adobe Audition CS6中删除它们.